Table of Contents
前言
2023 鐵人賽 DAY-29 下單介面
剩下兩天了
昨天我們把畫面搞了個大概
除了功能、外觀之外
還有一些資料要處理
今天會完成這些
還差什麼?
先看一下昨天的 Figma
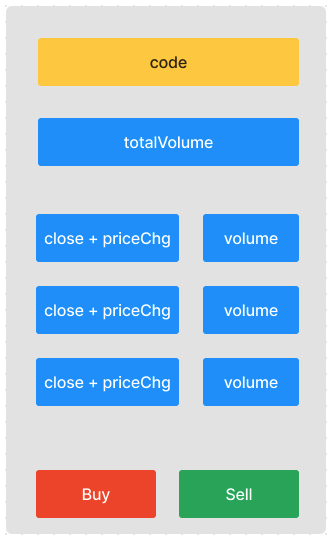
再來比較一下畫面
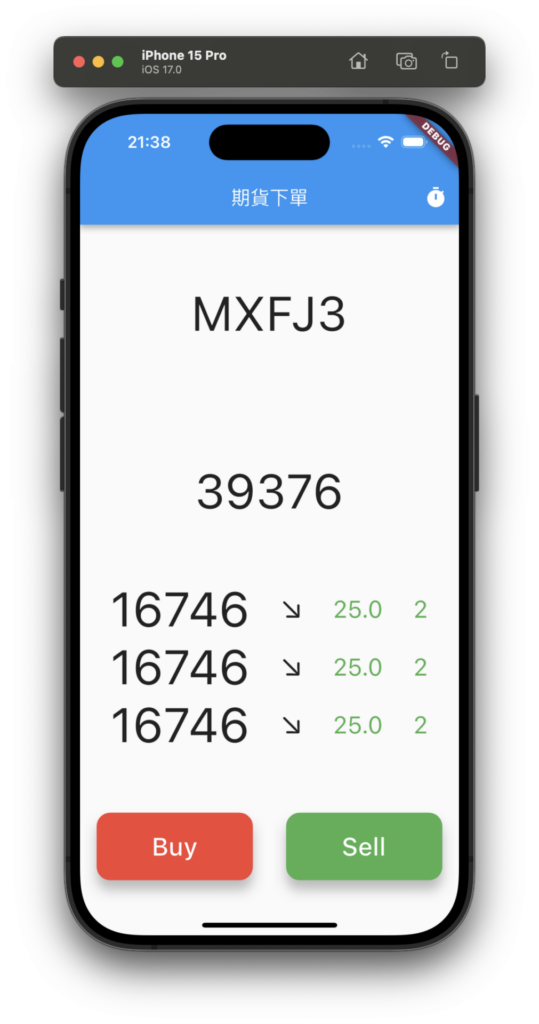
外觀上是有像
但很關鍵的一個差異
就是本來規劃的是近三次搓合
但我們現在還是三個一模一樣的資料
很明顯,我們需要將前兩次存起來
  Future<List<RealTimeFutureTick?>> lastTickList = Future.value(<RealTimeFutureTick?>[]);
  List<RealTimeFutureTick> tickList = [];
宣告一個 Array 來放
然後在每次資料進來就先放進去
然後!
最重要的是要記得刪
先進先出,把第一筆刪掉
否則記憶體會超出你的想像
setState(() {
  final msg = pb.FutureRealTimeTickMessage.fromBuffer(message as List<int>);
  if (tickList.length > 3) {
    tickList.removeAt(0);
  }
  tickList.add(RealTimeFutureTick.fromProto(msg));
  lastTickList = Future<List<RealTimeFutureTick>>.value(tickList);
});
這邊是在 WebSocket 資料進來處理的地方
因為我們只要三筆
所以當大於三筆
就刪除第一筆
在顯示的部分
也把資料型態的部分變成 Array
<code>FutureBuilder<List<RealTimeFutureTick?>></code>然後也小小偷懶了一下
在資料筆數少於三筆時,就顯示轉圈圈
這邊是因為演示
正式環境,當然不能錯失掉任何資料
final list = snapshot.data!;
if (list.length < 3) {
  return const Center(
    child: CircularProgressIndicator(
      color: Colors.black,
    ),
  );
}
final last = list[2];
也順便把最後一筆宣告成 last
要記得調整一下我們在昨天包再一起的三個搓合
Row(
  mainAxisAlignment: MainAxisAlignment.spaceEvenly,
  children: [
    Text(
      last.close!.toInt().toString(),
      style: const TextStyle(fontSize: 50),
    ),
    Text(
      '${last.changeType}',
      style: const TextStyle(fontSize: 30),
    ),
    Text(
      last.priceChg!.abs().toString(),
      style: TextStyle(
        fontSize: 25,
        color: last.priceChg! > 0 ? Colors.red : Colors.green,
      ),
    ),
    Text(
      last.volume!.abs().toString(),
      style: TextStyle(
        fontSize: 35,
        color: last.priceChg! > 0 ? Colors.red : Colors.green,
      ),
    ),
  ],
),
Row(
  mainAxisAlignment: MainAxisAlignment.spaceEvenly,
  children: [
    Text(
      list[1]!.close!.toInt().toString(),
      style: const TextStyle(fontSize: 50, color: Colors.black45),
    ),
    Text(
      '${list[1]!.changeType}',
      style: const TextStyle(fontSize: 30),
    ),
    Text(
      list[1]!.priceChg!.abs().toString(),
      style: TextStyle(
        fontSize: 25,
        color: list[1]!.priceChg! > 0 ? Colors.red : Colors.green,
      ),
    ),
    Text(
      list[1]!.volume!.abs().toString(),
      style: TextStyle(
        fontSize: 35,
        color: list[1]!.priceChg! > 0 ? Colors.red : Colors.green,
      ),
    ),
  ],
),
Row(
  mainAxisAlignment: MainAxisAlignment.spaceEvenly,
  children: [
    Text(
      list[0]!.close!.toInt().toString(),
      style: const TextStyle(fontSize: 50, color: Colors.black12),
    ),
    Text(
      '${list[0]!.changeType}',
      style: const TextStyle(fontSize: 30),
    ),
    Text(
      list[0]!.priceChg!.abs().toString(),
      style: TextStyle(
        fontSize: 25,
        color: list[0]!.priceChg! > 0 ? Colors.red : Colors.green,
      ),
    ),
    Text(
      list[0]!.volume!.abs().toString(),
      style: TextStyle(
        fontSize: 35,
        color: list[0]!.priceChg! > 0 ? Colors.red : Colors.green,
      ),
    ),
  ],
),
有順便美化一下
把最新以外的都灰化一下
把交易量變大
這個時候畫面更是一回事了
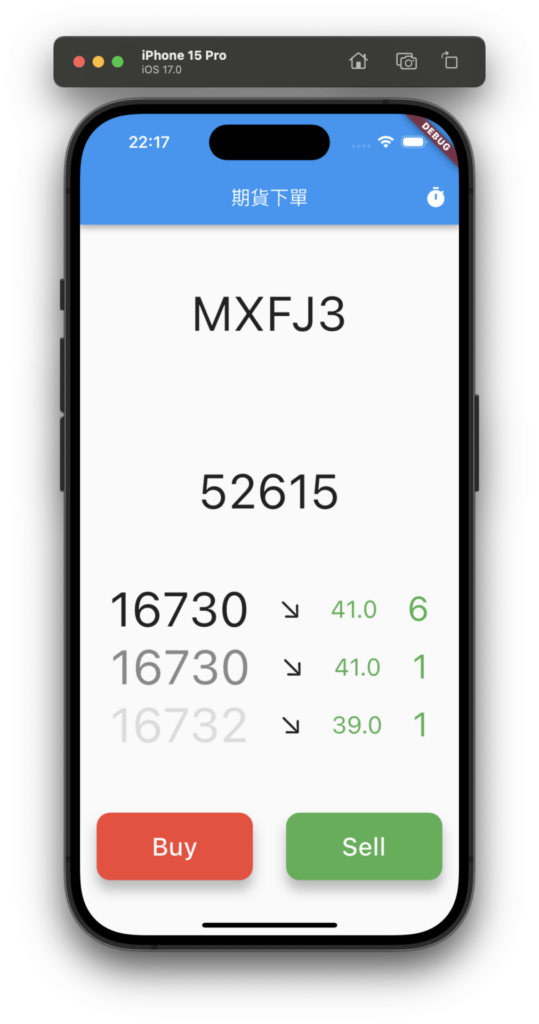
剛好截圖的這個時候
三筆都是不一樣的
成功的演示~
把 API 串上
資料有了
再來就是把之前的按鈕加上方法
之前演示的時候
是手動輸入價格
現在當然就是直接帶入畫面上的價格囉
先來回顧一下
買、賣的方法長什麼樣子
Future<TradeResponse> buyFuture(OrderRequest order) async {
  final response = await http.put(
    Uri.parse('http://127.0.0.1:8080/trade/future/buy'),
    body: jsonEncode(order.toJson()),
  );
  if (response.statusCode == 200) {
    return TradeResponse.fromJson(jsonDecode(response.body) as Map<String, dynamic>);
  }
  throw Exception('Failed to buy future');
}

Future<TradeResponse> sellFuture(OrderRequest order) async {
  final response = await http.put(
    Uri.parse('http://127.0.0.1:8080/trade/future/buy'),
    body: jsonEncode(order.toJson()),
  );
  if (response.statusCode == 200) {
    return TradeResponse.fromJson(jsonDecode(response.body) as Map<String, dynamic>);
  }
  throw Exception('Failed to sell future');
}
很明顯在按下按鈕的時候要組一個 OrderRequest
然後送出去
來加一下
ElevatedButton(
  style: ButtonStyle(
    shape: MaterialStateProperty.all<RoundedRectangleBorder>(
      RoundedRectangleBorder(
        borderRadius: BorderRadius.circular(14),
      ),
    ),
    elevation: MaterialStateProperty.all(10),
    backgroundColor: MaterialStateProperty.all(Colors.red),
  ),
  onPressed: () {
    buyFuture(OrderRequest(code: 'MXFJ3', baseOrder: BaseOrder(price: last.close!.toInt(), quantity: 1)));
  },
  child: const SizedBox(
    width: 130,
    height: 70,
    child: Center(
      child: Text(
        "Buy",
        style: TextStyle(
          fontSize: 26,
          color: Colors.white,
        ),
      ),
    ),
  ),
),
ElevatedButton(
  style: ButtonStyle(
    shape: MaterialStateProperty.all<RoundedRectangleBorder>(
      RoundedRectangleBorder(
        borderRadius: BorderRadius.circular(14),
      ),
    ),
    elevation: MaterialStateProperty.all(10),
    backgroundColor: MaterialStateProperty.all(Colors.green),
  ),
  onPressed: () {
    sellFuture(OrderRequest(code: 'MXFJ3', baseOrder: BaseOrder(price: last.close!.toInt(), quantity: 1)));
  },
  child: const SizedBox(
    width: 130,
    height: 70,
    child: Center(
      child: Text(
        "Sell",
        style: TextStyle(
          fontSize: 26,
          color: Colors.white,
        ),
      ),
    ),
  ),
)
這個時候可以來試著按按看
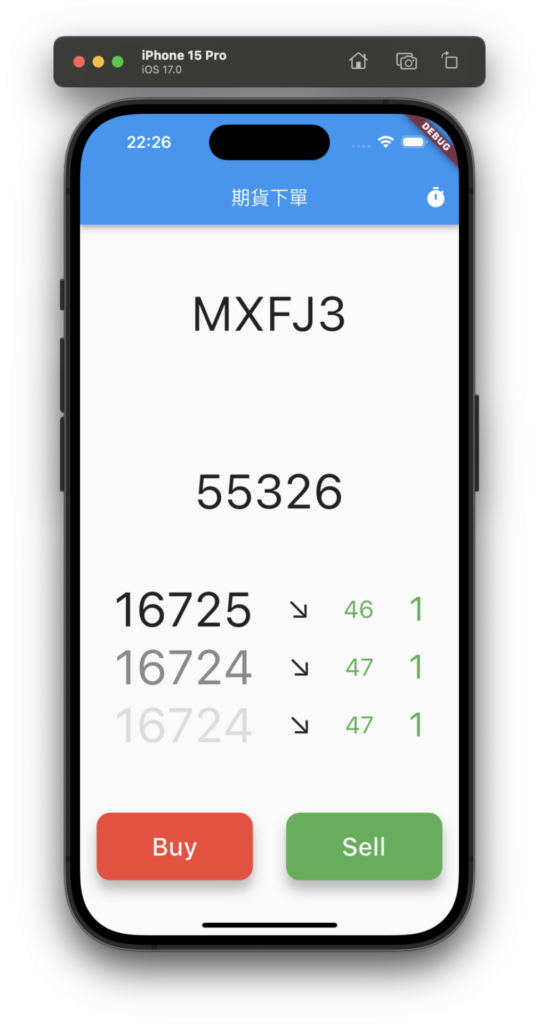
到券商系統看看
真的!串起來了
而且是不用輸入價格的
有時候交易就是拼手快啊!

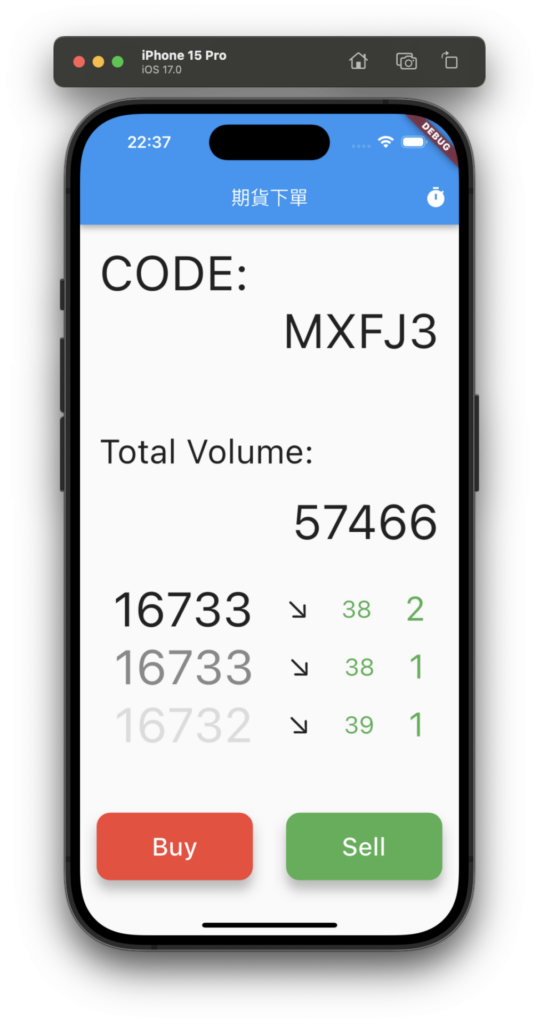
加上一些文字
最後我稍微加一些字
排版一下
就不多做說明了
不過提供一下 Code
Expanded(
  child: Padding(
    padding: const EdgeInsets.all(20.0),
    child: Column(
      children: [
        const Row(
          mainAxisAlignment: MainAxisAlignment.start,
          children: [
            Text(
              'CODE:',
              style: TextStyle(fontSize: 50),
            ),
          ],
        ),
        Row(
          mainAxisAlignment: MainAxisAlignment.end,
          children: [
            Text(
              last!.code!,
              style: const TextStyle(fontSize: 50),
            ),
          ],
        ),
      ],
    ),
  ),
),
Expanded(
  child: Padding(
    padding: const EdgeInsets.all(20.0),
    child: Column(
      mainAxisAlignment: MainAxisAlignment.spaceAround,
      children: [
        const Row(
          mainAxisAlignment: MainAxisAlignment.start,
          children: [
            Text(
              'Total Volume:',
              // last.totalVolume!.toString(),
              style: TextStyle(fontSize: 35),
            ),
          ],
        ),
        Row(
          mainAxisAlignment: MainAxisAlignment.end,
          children: [
            Text(
              last.totalVolume!.toString(),
              // last.totalVolume!.toString(),
              style: const TextStyle(fontSize: 50),
            ),
          ],
        ),
      ],
    ),
  ),
),
最後
我們畫面會長這樣
總結
2023 鐵人賽 DAY-29 下單介面
到介面這段
總算是完成了
但別忘記我們其實是三個專案哦
明天最後一天
我會用三個後端的監控
來做最後的收尾~
